Blog

  • JustMarkets  Review

    JustMarkets Review

    JustMarkets– Brief company intro

    JustMarkets was established in 2012 as a brand of IPC Trade Inc., and this means the broker house has a relatively long-lasting presence in the business. The company not only upgraded its name but got licensed by four independent regulators. Previously, we were very skeptical about this broker, but now the company seems legit and we are going to research every detail of their trading services and conditions.

    The Safety and Security of JustMarkets

    The broker holds licenses from four different regulators. With this many overseeing authorities it will be super difficult for the company to scam traders without losing the license in the process. The regulators are

    • Cyprus Securities and Exchange Commission (CySEC)
    • Seychelles Financial Services Authority (FSA)
    • South African Financial Sector Conduct Authority (FSCA)
    • Mauritius Financial Services Commission (FSC)

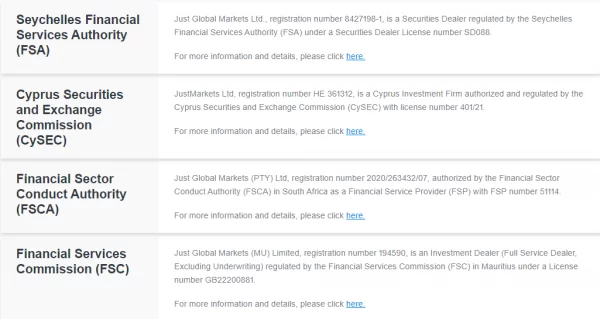
    Offshore regulators are not very strict, but three of them together with South African authority should do the job of overseeing the broker’s activities. We can safely assume, that JustMarkets was reborn to become a legit and robust broker. Time will show how they adhere to the guidelines of the regulators.

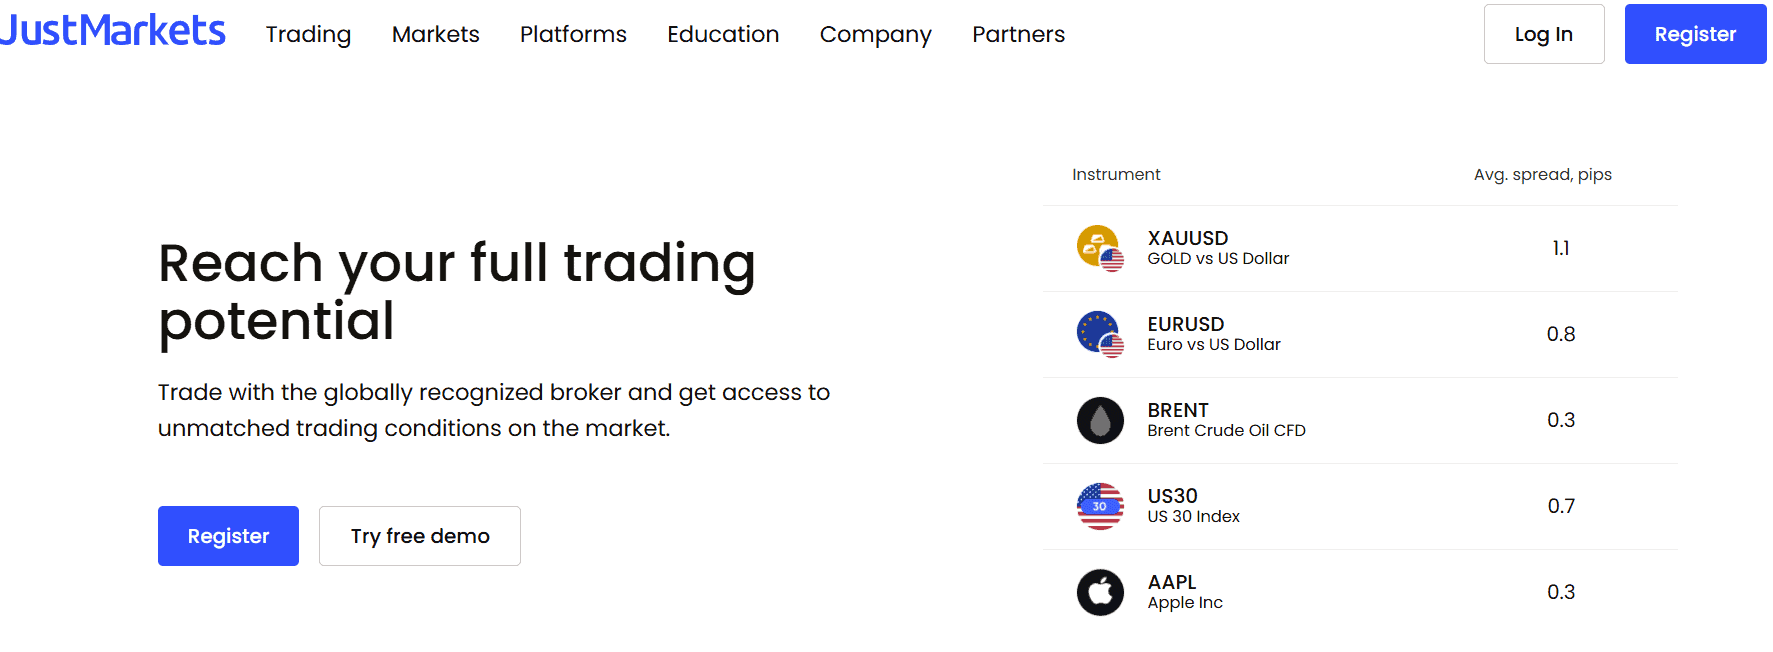
    JustMarkets Fees and Spreads

    If the broker is honest about its spreads on the website, then JustMarkets offers ultra-competitive spreads and fees. Their 0.3 and 0.1 pips are way below the industry average 1 pip margin. The commission for 0 spreads is 3 USD per side per lot which is also below the industry average of 7 USD round turn. But when checking the contract specifications the spreads are mentioned to start from 0.6 pips. We will assume this is the average spread in live markets. It is still below the industry average which is very advantageous.

    JustMarkets will charge a monthly fee of 5 USD after 151 days of inactivity.

    Accounts, Deposits, and Withdrawals of JustMarkets

    justforex accounts

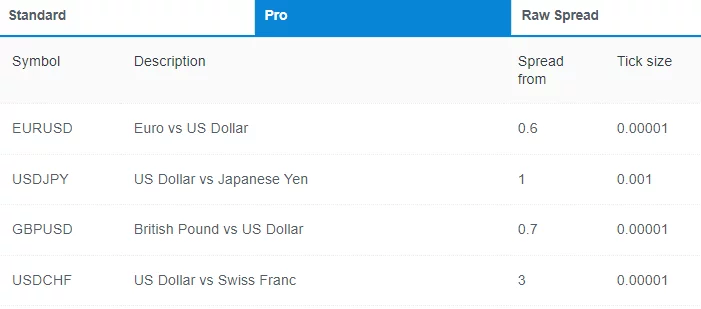
    The broker offers now three different account types called Standard, Pro, and Raw spread accounts. All three account types come with a maximum leverage of 1:3000 and exceptionally low spreads. The minimum deposit requirements start from 1 USD on the standard accounts. Both the pro and raw spread accounts require a 100 USD minimum deposit and offer lower spreads. The pro account has spreads from 0.1 pips and the raw spread account comes with 0 pips.  Traders will have to pay a commission of units of base currency per side per lot for raw spread 0 pips. The standard account has spreads from 0.6 pips which is super competitive.

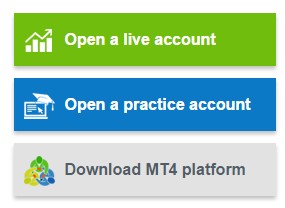
    Of course, you can first “test the waters” with the help of a demo account, which does not have a time limit.

    Deposits and Withdrawals

    JustMarkets also upgraded accepted payment options and it now consists of wire transfers, bank cards, Srkill, Neteller, Perfect Money, mybux, and Fasapay. What this means is you will be able to deposit and withdraw the funds with the help of several most common money-processing services. The process usually takes up to 24h, depending on the banking method used.

    JustMarkets Trading Assets and Features

    JustMarkets offers a wide range of trading assets including Forex pairs, indices, commodities, stocks, and cryptos. The broker enables its traders to find and trade any of the preferred instruments from one platform. The total number of tradable instruments is 262.

    Of these instruments, 162 are stock CFDs enabling traders to make money no matter the market direction. The CFDs can be short sold right away which is not possible in the case of real stocks. JustMarkets provides access to 17 indices, 13 cryptos, 61 Forex pairs, and 9 commodities.
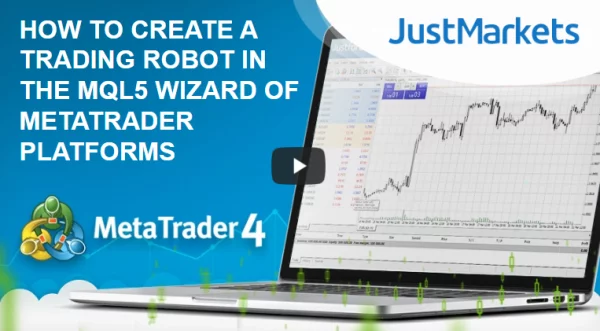
    Trading software

    When it comes to the trading platform, JustMarkets broker does not offer anything revolutionary, and they are sticking to the tried and tested software solutions – MetaTrader 4 and MetaTrader 5. These platforms are used by the majority of trading providers, and they come equipped with several valuable tools, such as an economic calendar, trading signals, Expert Advisors, technical indicators, and so on.

    Bonuses and promotions

    A 120% bonus can be acquired after registering on the website. The welcome bonus is also active and the broker has a dedicated section for promotions on their website. The broker seems to be targeting traders from around the world and is offering several promotions. All in all, we are glad to see the broker improved its services, and licenses and is now working on accumulating a client base.

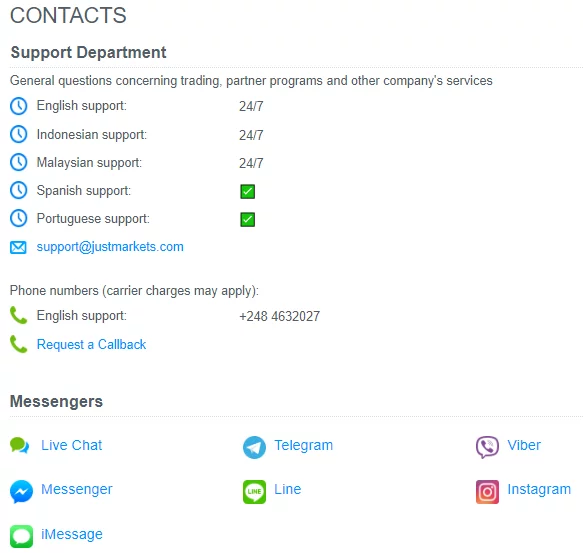
    JustMarkets Customer support

    The site of JustMarkets Forex broker is available in several languages, and the broker also offers multilingual live chat. Clients can contact the staff via mail, or call back option also, and the overall quality of the customer support service with JustMarkets no longer needs improvements. Everything is in its place and easy to find. The improvements are clear in this department as well. Overall, JustMarkets is one of the brokers who have greatly improved its service over the years.

    JustMarkets Education explained

    The education center is divided into two parts: analytics and learning center. Educational resources include quick start, online webinars, Forex articles, Forex glossary, educational videos, and guides on currencies. Webinars will teach beginners all the essential basics about financial markets and video tutorials will provide learning by showing examples. The educational services from JustMarkets are excellent and cover all aspects of trading from zero to hero.

    The broker is not shy in offering various trading and market research tools as well. The tools encompass an economic calendar, daily forecasts, market overviews, and market news. With these tools and resources, it will become possible to track daily news and fundamental news from one platform.

  • Neural Frames Review: The AI Video Tool Every Musician Needs

    Neural Frames Review: The AI Video Tool Every Musician Needs

    Have you ever found yourself with a song and a vision but have no clue how to bring them together visually without burning through your savings or learning complex editing software? You have music you’re proud of, but no idea how to turn that into something people can see and feel.

    That’s what led me to Neural Frames. It’s a tool that takes your words and sound and spins them into frame-by-frame animations that move with the music.

    In this Neural Frames review, I’ll discuss the pros and cons, what it is, who it’s best for, and its key features. Then, I’ll show you how I used Neural Frames to generate and edit this unique video of a bustling art deco metropolis:

    Neural Frames

    I’ll finish the article by comparing Neural Frames with my top three alternatives (HeyGenInVideo, and Synthesia).

    Whether you’re an artist, content creator, or just someone who wants their videos to match your music, Neural Frames gives you real creative control without the gatekeeping.

    Let’s see what makes it special, how it works, and whether it’s the right fit for you!

    Verdict

    Neural Frames makes creating high-quality, music-synced videos easy. Some features may take some time to learn. However, it’s a powerful, budget-friendly option for creative video making.

    Pros and Cons

    • A user-friendly interface for people of all skill levels.
    • Supports professional video output, including 4K resolution.
    • Graphics processing speeds up to three times faster than competitors for quick video generation.
    • Fine-tune animations frame-by-frame and create custom styles.
    • Create music-synced animations and beat-based visuals.
    • Track and adjust the video creation process in real time.
    • Retain full rights to your generated videos.
    • More affordable than traditional video production.
    • Easily works with existing video editing software for a better workflow.
    • Real-time project sharing and team collaboration.
    • Get insights into viewer engagement and video performance.
    • While user-friendly, mastering advanced features and customization can take time.
    • It may be restrictive for some advanced projects.
    • Some premium features and higher-quality outputs are only available on more expensive subscription plans.
    • Those who struggle to articulate their ideas in words may find prompt-based creation challenging.
    • Relying too much on AI can reduce chances for more personal, hands-on creativity.

    What is Neural Frames?

    neural frames – the synthesizer for the visual world.

    Neural Frames is an AI platform that turns text prompts into captivating videos with unique effects. It’s a popular tool for making music videos, art, and AI animations.

    Many people consider Neural Frames a “visual synthesizer.” Think of it like this: if your DAW lets you create soundscapes from scratch, Neural Frames lets you do the same with video.

    What makes Neural Frames so special is how it creates frame-by-frame animations from text prompts that react to music. It uses artificial neural networks trained on billions of images. This gives every video a dynamic feel that moves in sync with the sound, setting Neural Frames apart compared to other AI video generators.

    The quality is impressive too. The animations run at 25 frames per second, which is about 40% more fluid than some other AI video tools. Plus, being able to export in up to 4K resolution means the videos look professional even on larger screens.

    One feature that impressed me was how it extracts stems from your music. It separates vocals, drums, bass, etc., and creates different visual responses for each. For example, you can get the visuals to pump with the kick drum while simultaneously morphing with the synth to create this incredible sense of cohesion.

    It’s easy to generate really unique and interesting-looking videos with Neural Frames. However, that doesn’t mean there isn’t a learning curve. For one, you’ll have to learn how to articulate effective prompts to give you the right aesthetic. From there, you’ll need to explore the camera settings, presets, and sliders to fine-tune your clips and bring your vision to life.

    For musicians on a budget (which, let’s be real, is most musicians), Neural Frames can be a huge game-changer. Instead of releasing just one music video for an album’s lead single, you can create unique visualizers for every track. That can dramatically increase your engagement on platforms like YouTube and Instagram, where visual content is king.

    If you’re a musician or content creator looking to elevate your visual game without breaking the bank, I can’t recommend Neural Frames enough. It’s transforming how musicians are releasing music and connecting to their audience.

    Who is Neural Frames Best For?

    Here are the types of people who would get the most out of Neural Frames:

    • Musicians can use Neural Frames to create eye-catching, audio-reactive music videos that sync perfectly with their songs. This helps them stand out and grow their fan base without high production costs.
    • Content creators and artists can use Neural Frames to create interesting visuals for storytelling, branding, and social media.
    • Creatives can use Neural Frames to create AI-generated art, experiment with animation, and customize every detail to bring ideas to life.
    • Production teams and agencies can use Neural Frames to generate high-quality video content at scale. Neural Frames offers tools that fit both solo creators and full teams.

    Neural Frames Key Features

    Here are the key features for Neural Frames:

    • Frame-by-frame control over motion, transformations, and artistic effects.
    • Fine-tune parameters such as strength, flicker, edge echo, and smoothness for smooth transitions and dynamic morphing effects.
    • Animate specific objects or people with custom models for personalized results.
    • Extracts stems (individual instrument tracks) from audio automatically.
    • Audioreactive effects make visuals move with the music.
    • Video editor with timeline, prompt help, and snap-to-grid.
    • Undo/redo, autosave, and start/stop rendering for easy edits and quick changes.
    • Upscaling to 1080p or 4K (depending on the subscription) for professional-quality videos without extra cost.
    • Graphics processing is fast (up to three times faster than competitors) for quick video generation and iteration.
    • Turbo mode for ultra-fast rendering. It increases rendering speed by 400% but decreases the image quality.
    • AI prompt helper to write better prompts.
    • Supports videos up to 10 minutes long.

    How to Use Neural Frames

    Here’s how I used Neural Frames to generate and edit a dynamic video:

    1. Create an Account
    2. Create an Image
    3. Add a Prompt
    4. Generate Images
    5. Choose an Image
    6. Tweak the Prompt Settings
    7. Choose a Preset
    8. Export & Download the Video
    9. Add Music
    10. Match the Song to the Visuals

    Step 1: Create an Account

    Creating an account on Neural Frames.

    I started by going to neuralframes.com and selecting “Start Now” on the top right.

    Step 2: Create an Image

    Creating an image with Neural Frames.

    After I created an account, Neural Frames granted me 30 credits to use its features for free. I was immediately taken to the AI video generator.

    At the top, I was given two options: create or upload an image. I chose “Create.”

    Step 3: Add a Prompt

    Adding a text prompt to Neural Frames to generate a video.

    Next, I was asked to enter a prompt in the text field describing what I wanted to create. Neural Frames already filled the empty field for me with the following prompt:

    “A bustling art deco metropolis, cityscape, vibrant nightlife, high-contrast, cinematic, futurism, Syd Mead-inspired, cyberpunk, neon-lit, twilight hues, mystical atmosphere.”

    It was a good starting point, especially since I wasn’t sure what I wanted initially.

    You can always tweak your prompt or come up with your own. Just make sure it’s descriptive!

    Step 4: Generate Images

    Text ptrompt settings when generating a video with Neural Frames.

    Below the prompt field were some additional options:

    • Add a negative text prompt
    • Turbo Mode (increase rendering speed by 400%, but decreases image quality)
    • Choose a style reference
    • Select an aspect ratio

    I kept everything on default, chose a 16:9 aspect ratio, and hit “Create.” Generating a video with Neural Frames costs three credits.

    Step 5: Choose an Image

    Selecting one of the images generated with Neural Frames to be used as the first frame of a video.

    Seconds later, Neural Frames generated four images. I chose one of the images to be used as the first frame, which took me to the video editor.

    Step 6: Tweak the Prompt Settings

    The Prompt Settings in the Neural Frames AI video editor.

    Immediately, I was taken to the Neural Frames video editor!

    Neural Frames has a unique video creation process. Rather than generating a full video, I had to generate each clip by adjusting the prompt settings in the left panel.

    On the left panel was the prompt input tab. This was where I could enter new prompts and choose my camera settings.

    Step 7: Choose a Preset

    Exploring the presets in the Prompt Settings when generating a video with Neural Frames.

    All the sliders in the camera settings felt intimidating, which was why I loved taking advantage of the presets at the top.

    These presets gave me an excellent starting point while giving me the freedom to adjust the sliders to my liking. I could preview the presets by hovering over the little “i” to see which preset I wanted to apply.

    These settings would be individually applied to each clip, and I could choose a new starting image for each clip. For my first clip, I chose the “Infinite Rotation” preset.

    After hitting “Create,” Neural Frames created a video from where my cursor was placed on the timeline. I could interrupt the process and go back to change or re-create sections if I wanted to. It was really cool seeing Neural Frames work its magic frame by frame.

    Step 8: Export & Download the Video

    Exporting a video from Neural Frames.

    Once my video was complete, I hit “Export” on the top right. Once exported, I selected it from my library and hit “Download.”

    Here’s how it came out:

    Neural Frames

    That video came out looking really interesting, and I was impressed by how quickly it was exported.

    Step 9: Add Music

    If you want to take things a step further, you can add background music and make the visuals synchronize with different elements of the song. Synchronizing the visuals to the music is great for music videos.

    Selecting a song from the Neural Frames library.

    At one point, a window appeared with Neural Frames asking if I wanted to add a soundtrack from their library. You can also double-click on the bottom of the timeline to add a song.

    Step 10: Match the Song to the Visuals

    Tweaking individual elements of a song added to a video made with Neural Frames.

    After selecting a song, Neural Frames automatically broke down the music in my timeline into individual stems.

    This is where things get more technical. You can select these stems within the timeline and make edits to them, like adjusting the strength and amplitude or turning on or off the oscillator to match the visuals.

    To learn more about how to match the music to your video, I’d encourage you to watch the video below:

    How to create an AI music video in 10 minutes with a visual synthesizer (NEW WALKTHROUGH)

    Overall, Neural Frames made it easy to generate a unique video from prompt creation to video export. I was impressed by how simple the process felt, especially seeing the animation come to life frame by frame. The presets took my video to another level, adding unique edits I could easily tweak.

  • Gauthmath Review: Can This App Solve Any Math Problem?

    Gauthmath Review: Can This App Solve Any Math Problem?

    Have you ever stared at a math problem for so long that it started to look like a foreign language? I’ve never been a big “math person,” so you’re not alone.

    Studies show that nearly 37% of students report math as their most challenging subject in school. And let’s be real, between confusing equations, tight deadlines, and the pressure to “just get it,” it’s easy to feel overwhelmed.

    I recently came across Gauthmath, an online tool and app that helps break down tough math problems step by step. It’s like having a tutor in your pocket.

    In this Gauthmath review, I’ll discuss the pros and cons, what it is, who it’s best for, and its key features. Then, I’ll show you how I used Gauthmath to solve a math problem in seconds.

    I’ll finish the article by comparing Gauthmath with my top three alternatives (MathGPTProMathway, and Symbolab). By the end, you’ll know if Gauthmath is right for you!

    Whether you’re rushing to finish homework, preparing for a big test, or trying to understand how an equation works, Gauthmath breaks it all down. Let’s see why it might be your new favorite study hack.

    Verdict

    Gauthmath is a fast and user-friendly math solver that’s great for getting step-by-step help across all levels. It also offers live tutor support and a strong student community. While it has some limits on free use and may struggle with complex answers, it’s a solid tool for homework and quick prep.

    Pros and Cons

    • Instantly get solutions with the AI photo solver (even handwritten problems)
    • Covers all math levels, from basic arithmetic to advanced calculus
    • Step-by-step explanations to help with learning and understanding
    • Easy to use with a clean, student-friendly interface
    • Free basic features, with optional premium upgrades
    • 24/7 live tutor support for tougher questions
    • An active student community for sharing and learning together
    • Saves time, which is perfect for homework and last-minute prep
    • The AI occasionally gives wrong answers, especially with more complex or messy questions
    • Limited free access to daily questions, unless you upgrade
    • The live help from tutors isn’t always instant
    • Best for math, while other subjects are limited
    • No graphing tools, so you can’t visualize equations or functions

    What is Gauthmath?

    Thank You, Gauth Community ❤️

    Gauthmath is an AI academic assistant designed for students struggling with STEM (Science, Technology, Engineering, and Mathematics) subjects.

    Think of it as having a tutor in your pocket who never gets tired, frustrated, or charges by the hour. It combines sophisticated artificial intelligence with human tutors to help students tackle everything from basic arithmetic to complex calculus problems.

    Core Functionality

    The core functionality is surprisingly straightforward. You can input problems in three different ways:

    1. Text: Type in your question. This option is perfect for straightforward problems or multiple-choice questions.
    2. Image: Upload a picture of the problem (even handwritten ones!), and the AI interprets it.
    3. PDF: This one’s a game-changer for anyone working with digital worksheets or textbooks. For example, you can upload an entire homework packet, and Gauthmath will identify and solve each problem individually.

    Technology (Gauth AI)

    Behind all this is what they call “Gauth AI,” the technology that powers the entire platform.

    It’s not just a simple calculator. It’s sophisticated enough to understand context, recognize various formats of questions, and provide step-by-step explanations.

    Gauth’s AI solves problems using “industry-leading algorithms,” meaning it can handle some seriously complex stuff.

    Subject Coverage (Math, Calculus, Chemistry, Biology, Business, etc.)

    What really impressed me was the range of subjects Gauthmath covers. It handles traditional math quite well (algebra, geometry, trigonometry).

    However, it also tackles more advanced topics like calculus and statistics with impressive accuracy. Beyond math, Gauthmath supports chemistry and biology.

    Who is Gauthmath Best For?

    Here’s who Gauthmath is best for:

    • Students: The app is designed to help elementary, middle, and high school students (especially those in grades 6-12) with math homework and academic challenges.
    • Gen-Z Learners: Gauthmath is especially popular among teenagers and young adults comfortable with mobile apps and digital learning platforms.
    • STEM Students: Gauthmath is best for students tackling math, calculus, chemistry, biology, and other STEM subjects.
    • Students Seeking On-Demand Help: Students needing instant, step-by-step solutions, explanations, or live tutor support at any time.
    • Students Who Prefer Visual Learning: With features like photo and PDF uploads, Gauthmath is a great option for students who want to quickly scan or upload problems rather than type them out.

    Gauthmath Key Features

    Here are Gauthmath’s key features:

    • AI Homework Helper: Get instant help with homework problems across math, science, and more with advanced AI.
    • AI Writing Helper: Get writing assistance for any essay topic at various academic levels (High School, Undergraduate, and Master’s). Generate drafts and polish your writing.
    • AI Photo Solver: Upload a photo of a problem and get an instant solution.
    • PDF Upload: Upload worksheets or packets where each question gets solved individually.
    • AI Calculator: Solve problems with an advanced, function-rich calculator.
    • Step-by-Step Explanations: See every step clearly explained for a deeper understanding.
    • Wide Subject Coverage: Supports math and other academic subjects like science, biology, and writing.
    • AI & Human Expert Support: Connect with live tutors to get solutions in minutes when the AI needs a human touch.
    • Interactive AI Chat: Ask follow-ups and get custom explanations or simplifications to answers in real-time.
    • Community: Collaborate with others to ask, answer, and learn together.
    • Gauthmath App: Access Gauthmath’s features in one user-friendly mobile app. It’s available on iOS and Android for learning on the go.

    How to Use Gauthmath

    Here’s how I used Gauthmath to solve a math problem in seconds:

    1. Sign Up for Gauthmath
    2. Explore the AI Homework Helper
    3. Choose a Subject Category
    4. Ask a Question
    5. Receive an Answer
    6. Hire a Tutor

    Step 1: Sign Up for Gauthmath

    Signing up for Gauthmath.

    I started by going to gauthmath.com and selecting “Sign In” on the top right.

    Step 2: Explore the AI Homework Helper

    Typing in a question or uploading an image or PDF to Gauthmath.

    After creating an account, I was taken to my Homework page to access the Gauth AI Homework Helper. I could type a question or upload an image or PDF to solve the questions on it.

    Uploading an image is best for complex equations. Just make sure the photo is clear and includes the entire problem. Try to take your photos in good lighting, directly above the page, with the problem centered.

    Step 3: Choose a Subject Category

    Choosing a subject category on Gauthmath.

    For more accurate answers, you can select one of the subject categories and ask Gauthmath a question. Gauthmath covers math, calculus, chemistry, biology, business, social science, and more.

    Step 4: Ask a Question

    Giving the Gauth AI Homework Helper a question.

    I ended up typing in this question: “A rectangle has a perimeter of 54 cm. The length is 3 cm more than twice the width. What are the rectangle’s dimensions?” and hit Enter on my keyboard.

    Gauthmath works best when you’re specific. Frame questions properly and provide clear images. The quality of responses will improve dramatically!

    Step 5: Receive an Answer

    A solution provided by Gauth AI with related questions and the option to ask a follow-up, explain, or simplify the solution.

    Seconds later, Gauth had the answer! It was generated quickly and broken down succinctly into chronological steps:

    1. Define the variables for the dimensions of the rectangle.
      Let the width be w cm. Then, the length l can be expressed as l = 2w +3 cm.
    2. Write the formula for the perimeter of a rectangle.
      The perimeter P of a rectangle is given by the formula:P = 2l + 2w
    3. Substitute the known perimeter into the equation.
      Given that the perimeter is 54 cm, we can set up the equation:2(2w + 3) + 2w = 54
    4. Simplify the equation.
      Expanding the equation gives:4w + 6 + 2w = 54Combining like terms results in:6w + 6 = 54
    5. Isolate the variable w
      Subtract 6 from both sides:6w = 54 – 66w = 48Now, divide both sides by 6:w = 48 divided by 6 = 8
    6. Calculate the length using the width.
      Substituting w = 8 back into the equation for length:l = 2(8) + 3 = 16 + 3 = 19

    The dimensions of the rectangle are:
    Width = 8 cm and Length = 19 cm.

    What I loved most is that it didn’t just give me the answer (which wouldn’t help much with learning anyway), it walked me through the process. It helps understand concepts, not just get homework done.

    There were even related questions on the right panel that I could explore. At the bottom, I could ask a follow-up question or get the Gauth AI chatbot to explain or simplify the answer.

    Step 6: Hire a Tutor

    Gauthmath tutors.

    For more complex problems, Gauthmath offers access to real human tutors. They have 50,000 verified experts who can tackle even the top 5% most difficult problems and deliver solutions within minutes.

    My only word of caution is this: don’t get too dependent on it. It’s easy to start reaching for the app before even attempting problems yourself.

    Gauthmath is more of a learning tool, not a crutch. Try each problem first before checking your work or asking for help.

    Overall, Gauthmath saves countless hours of frustration and makes homework time less stressful. Just remember that it’s a tool to help you learn, not do the work for you!

  • Planner 5D Review: Can It Fix Your Mismatched Living Room?

    Planner 5D Review: Can It Fix Your Mismatched Living Room?

    Have you ever stared at an empty room and thought, “Where do I even start?” Maybe it’s the mismatched furniture you’ve meant to replace for years. Maybe it’s the dream kitchen you’ve sketched on a napkin a dozen times. Or perhaps you’re just trying to make your space feel more you, without blowing your budget or hiring a professional.

    I recently came across Planner 5D, a beginner-friendly home design tool that helps bring your vision to life without needing a design degree. With its drag-and-drop simplicity and realistic 3D visuals, it makes planning your space feel less overwhelming (and even kind of fun).

    In this Planner 5D review, I’ll discuss the pros and cons, what it is, who it’s best for, and its key features. Then, I’ll show you how I used Planner 5D to create and customize this 4K render of a bedroom:

    The final render of a bedroom made with Planner 5D.

    I’ll finish the article by comparing Planner 5D with my top three alternatives (REimagineHomeHomestyler, and Foyr Neo). By the end, you’ll know if Planner 5D is right for you!

    Verdict

    Planner 5D is a beginner-friendly design tool with an extensive catalog, realistic rendering, and cross-platform access. It makes home and interior planning simple and accessible. While it lacks some advanced features and can slow down with more complex projects, it’s a solid choice for casual users, students, and professionals for quick and visual layouts.

    Pros and Cons

    • The user-friendly interface makes it easy to navigate for both beginners and professionals
    • Extensive catalog includes a wide range of furniture, textures, and decor
    • Detailed 2D and 3D planning, landscaping, and multi-storey layouts
    • Cross-platform access lets you work across web, iOS, and Android with real-time synchronization
    • Realistic rendering offers HD and 4K photorealistic visuals in 3D
    • Drag-and-drop tools make layout adjustments fast and beginner-friendly
    • Import custom objects and images for personalized 3D items
    • The web version can be slow, especially with large or complex projects
    • Lacks some advanced features like detailed material customization, lighting control, and advanced architecture tools
    • Only offers basic roof planning with limited customization
    • Premium features like high-quality renders and full catalog access are locked behind a paid plan
    • There may be occasional bugs and glitches, particularly when adjusting furniture colors
    • The catalog doesn’t always reflect the latest design trends

    What is Planner 5D?

    5 AI tools for interior design | Planner 5D

    Planner 5D is an all-in-one AI home design tool that lets you create floor plans and 3D home designs without any experience. It’s great for anyone fantasizing about renovating their entire house but has no clue where to start.

    Notable Features

    What makes this platform different from other design tools I’ve tried is how it combines artificial intelligence with user-friendly design features. The AI floor plan recognition tool alone saves hours of manual work!

    For example, you can upload a rough sketch of your kitchen layout. Within minutes, you can convert it into a digital floor plan.

    Another thing that sets Planner 5D apart from competitors is its massive furniture and decor library. They’ve got over 8,000 items to choose from!

    Plus, the AI features help when you’re trying to make design decisions. The automatic furniture arrangement suggestions have saved me from some questionable layout choices.

    Brief History & Evolution

    The platform has been around for a while now (since 2011), and you can tell they’ve refined their approach over the years. They started as a simple room planner but have evolved into this comprehensive design ecosystem that covers everything from interior decorating to landscape design.

    The growth has been pretty impressive, too. We’re talking about 120 million users who have created over 400 million home designs!

    Cross-Platform Availability (Windows, iOS, Android, macOS)

    The cross-platform availability is something I didn’t appreciate initially. You can access Planner 5D on pretty much any device: Windows, iOS, Android, and macOS. The sync between devices means I never lose my progress.

    What I love most about Planner 5D is how they’ve managed to make professional design tools accessible to anyone. The 4K renders produce results that look like they came from an expensive design firm, but I can create them from anywhere.

    If you’ve ever stared at an empty room and felt completely overwhelmed about where to start, Planner 5D bridges that gap between having ideas and executing them. It’s an excellent tool for any home improvement project, big or small.

    Who is Planner 5D Best For?

    Here’s who Planner 5D is best for:

    • Homeowners and renters can use Planner 5D to plan renovations, redecorate, or visualize changes in their homes or apartments with user-friendly tools.
    • Interior designers can use Planner 5D to create detailed 2D and 3D floor plans, present design concepts to clients, and produce high-quality renders.
    • Students and teachers can use Planner 5D to learn more about architecture and interior design through hands-on projects.
    • Hobbyists and design enthusiasts can use Planner 5D to experiment with layouts and styles with its simple drag-and-drop interface and a vast furniture catalog.

    Planner 5D Key Features

    Here are the Planner 5D features you should be aware of:

    • AI Design Tools: Create spaces quickly and effortlessly with AI suggestions for layouts, colors, furniture, and materials.
    • AI Designer & Smart Wizard: Instantly generate room layouts with multiple furniture arrangements based on your preferences.
    • 2D & 3D Visualization: Draw floor plans and toggle between 2D and 3D views for a full design perspective.
    • 360º Walkthroughs: Take immersive tours of your projects.
    • Extensive Furniture & Decor Catalog: Choose from over 8,000 items to furnish and personalize your space.
    • Customization & Editing: Customize furniture and walls, add colors, and apply textures.
    • Import Custom Models: Add your own 3D models or images for more personalization.
    • Advanced Rendering: Render projects in HD and 4K for realistic interior images.
    • Photorealistic Snapshots: Enhance images with shadows and lighting effects.
    • Cross-Platform Accessibility: Use on Windows, Android, iOS, and web with content synced across devices.
    • Floor Plan Recognition: Upload photos or scans to automatically generate digital layouts with AI.
    • Virtual Staging & AR: Digitally furnish empty rooms and use AR to view designs in your actual space.
    • Mood Boards: Collect and organize images and ideas for design inspiration.
    • Community & Templates: Join a community of over 120 million+ users and browse ready-made design templates.
    • Cost Estimation: Access hundreds of accurate home improvement and repair cost estimates based on real data.
    • User-Friendly Interface: Drag-and-drop tools that are perfect for beginners.

    How to Use Planner 5D

    Planner 5D Tutorial: Realistic Render

    Here’s how I used Planner 5D to create and customize a 4K render of a bedroom:

    1. Create a Planner 5D Account
    2. Create a New Project
    3. Select the Smart Wizard
    4. Choose the Room Shape
    5. Choose the Room Dimensions
    6. Select the Room Type & Style
    7. Furnish & Decorate Your Space
    8. Arrange Your Furniture
    9. View Your Project in 3D
    10. View the Render
    11. Adjust the Aspect Ratio, Angle, and Zoom
    12. Choose the Photo Quality
    13. Adjust Your Scene Settings
    14. Add & Adjust the Sunlight
    15. Render Your Project

    Step 1: Create a Planner 5D Account

    Getting started with Planner 5D.

    I started by going to planner5d.com and selecting “Get Started” on the homepage.

    Step 2: Create a New Project

    Creating a new project in Planner 5D.

    Once my account was created, I was taken to my projects. This was where I could create a new project from scratch or open one of the pre-designed renders.

    I selected “New Project” to start from scratch.

    Step 3: Select the Smart Wizard

    Next, I was presented with six ways to add or create my floor plan:

    1. From scratch
    2. Using the Smart Wizard
    3. Uploading a plan
    4. Using one of the templates
    5. Accessing one from my projects
    6. Hiring a designer

    I was most curious about the “Smart Wizard.” This option is best if you don’t have a floor plan but want to easily customize one with Planner 5D.

    Step 4: Choose the Room Shape

    Selecting a room shape in Planner 5D.

    Within the Smart Wizard, I was asked to choose the room shape. I chose the “L” shaped room and hit “Next Step.”

    Step 5: Choose the Room Dimensions

    Adding room dimensions to a floor plan on Planner 5D.

    The next step was adding room dimensions. These dimensions could be set in centimeters or inches. Make sure you measure your actual space to ensure your furniture will fit!

    Step 6: Select the Room Type & Style

    Choosing a room type and style in Planner 5D.

    The final step was selecting the room type and style. There were a variety of room types I could choose from:

    • Living Room
    • Kitchen
    • Bedroom
    • Office
    • Bathroom
    • Child Room
    • Open Space
    • Studio

    Within each room type were different styles I could choose from, with a preview of the room on the right. I went with a Japanese bedroom and hit “Complete.”

    Step 7: Furnish & Decorate Your Space

    Different furniture options to add to a floorplan made with Planner 5D.

    Once the floor plan is set up, this is where the fun really begins.

    The 3D house design tool lets you furnish and decorate your space with over 8,000 items. And their furniture library is massive, with everything from sofas to decorative plants.

    Step 8: Arrange Your Furniture

    Selecting an item and viewing the options on a floorplan made with Planner 5D..

    I could arrange everything in the room exactly how I wanted by clicking and dragging any item where I wanted it to be. Selecting an item opened a menu with the following options:

    • Rotate
    • Style
    • Copy
    • Center
    • Flip Horizontally
    • Flip Vertically
    • Add to Favorites
    • Delete

    Step 9: View Your Project in 3D

    Switching from 2D to 3D on a project in Planner 5D.

    I could even view my room in 3D by selecting it at the top and clicking and dragging on my screen to change the angle.

    However, the 4K rendering feature is what really impressed me. After placing all my furniture and decor, I could visualize the entire space with realistic lighting and shadows.

    Step 10: View the Render

    Accessing the 4K render in a project using Planner 5D.

    To access the 4K rendering feature (as well as screenshots, 360-degree panorama, and 360-degree walkthrough), I hovered over the camera icon at the top right.

    Step 11: Adjust the Aspect Ratio, Angle, and Zoom

    Selecting the aspect ratio and zoom when creating a render with Planner 5D.

    Next, I selected my aspect ratio, angle, and zoom.

    Step 12: Choose the Photo Quality

    CHoosing the photo quality for a render made with Planner 5D.

    I also chose the photo quality:

    • Draft
    • HD
    • Full HD
    • Quad HD
    • 4K

    The highest quality was 4K, so that’s what I chose. You can test your lighting by exporting your render in Draft first.

    Step 13: Adjust Your Scene Settings

    Adjusting the scene settings on a render made with Planner 5D.

    From there, I adjusted my Scene settings:

    • Ceiling lighting: Turn this on to light up the ceiling if you don’t have any lighting fixtures.
    • Auto-brightness: Prevents your render from having lighting that is too bright or too dark.
    • Background: Choose a background setting.

    Step 14: Add & Adjust the Sunlight

    Adjusting the sunlight on a render made with Planner 5D.

    Next, I adjusted the sun’s position and latitude. I was curious to observe how the morning light would filter into the room and transform the space.

    Step 15: Render Your Project

    Rendering a project in Planner 5D.

    Once I was happy with everything, I hit “Render” on the top right.

    Viewing the render progress of an image in Planner 5D.

    Immediately, Planner 5D began rendering my image. I could view its progress by selecting the gallery icon on the top right.

    A few minutes later, my render was ready! Here’s how it came out:

    The final render of a bedroom made with Planner 5D.

    Overall, I was pleased with the render. The level of detail was impressive, and it gave me a clear sense of how the lighting would interact with the space in a real-world setting.

    I also love the cross-platform functionality. This made it easy for me to start designs on my laptop and continue tweaking them on my phone while waiting at the doctor’s office or during my lunch break. The cloud sync keeps everything updated.

    What I love most about Planner 5D is how it’s helped me avoid expensive decorating mistakes. Before, I’d buy furniture on impulse and then realize it looked terrible in my space. Now I can test everything virtually first.

    If you’re considering redesigning a space in your home, try Planner 5D. It’ll save you time, money, and design headaches.

  • Hello world!

    Welcome to WordPress. This is your first post. Edit or delete it, then start writing!